
|
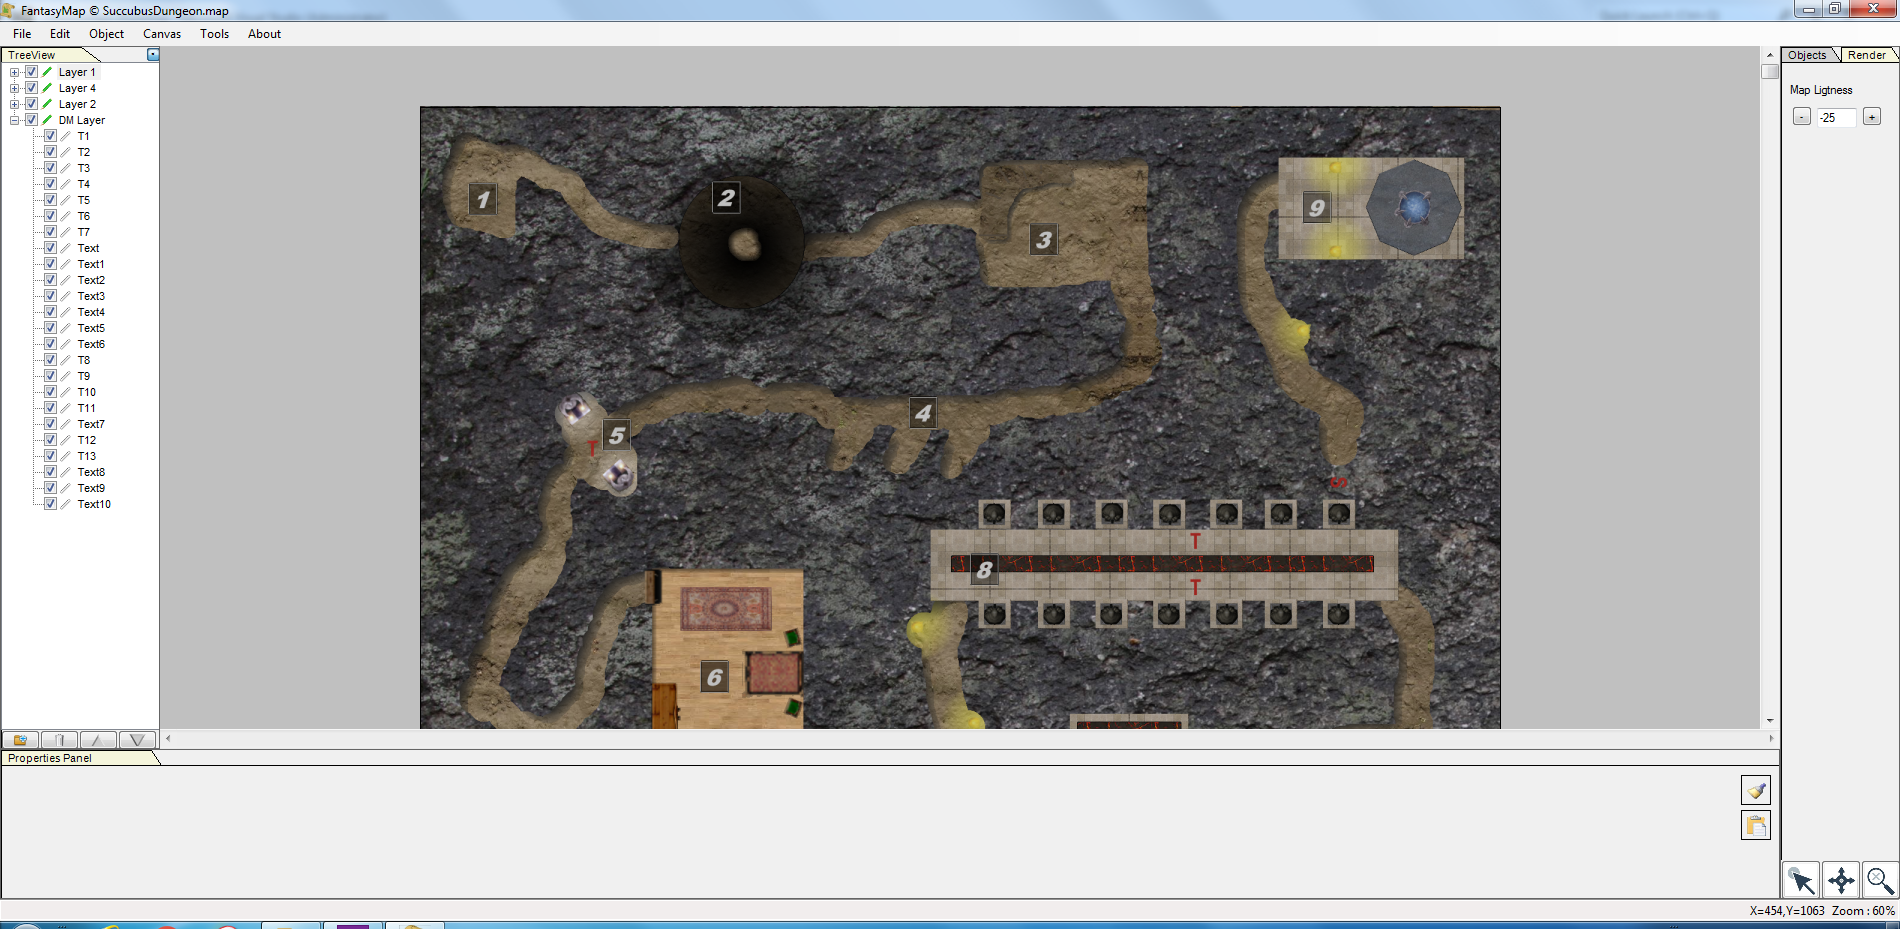
First of all, create your dungeon like the one in the picture... You like it? :-) From the file menù select Export Image command |
|
|
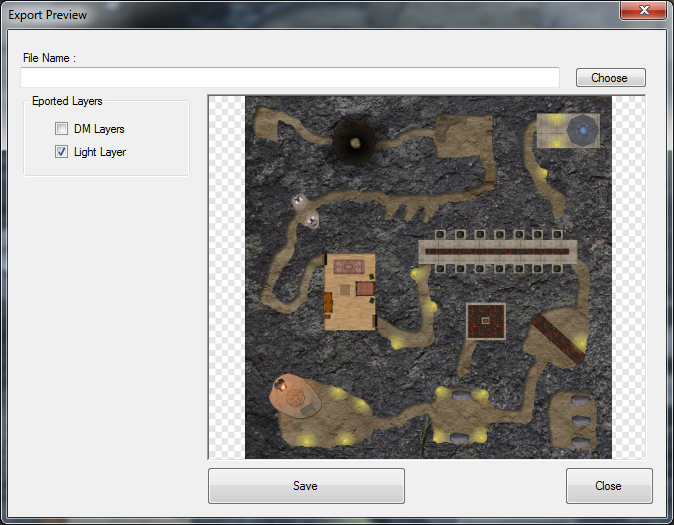
On the top of the import window you must choose PNG file name you are willing to export the dungeon. Remember you should make two different PNG
file for DM and Players map. When exporting the DM image, check the DM Layer Option in order to export also DM layers. As you see, in the tutorial map DM Layers option is not checked and in the preview map room numbers, secret passages and traps are not shown (because they are in a DM Layer). Check the Light option if you put some light into the map and you want to export the final rendering with lights effects. You will always see, on the right preview panel, what you are exporting to the PNG file. Click SAVE button to finalize export process. |